
The fastest kitchen reno ever. Well not really but, it did come together quite quickly.
I don't even think I had a chance to mention it here that it was happening.
Why?
The short story.
When we moved in years ago we could not afford a tile backsplash so we did a painted beadboard. It was wonderful, looked great and fulfilled the look at the time for about 100 dollars.
The beadboard started to need paint repairs after giving our little lady sink baths for about 2 years and we had been saving to do a real backsplash for awhile so the time had come and voila.
Our kitchen is also small. Not postage stamp small but there really isn't room for a hangout when I'm also cooking.
Storage is valuable and if it doesn't get used it can't stay.
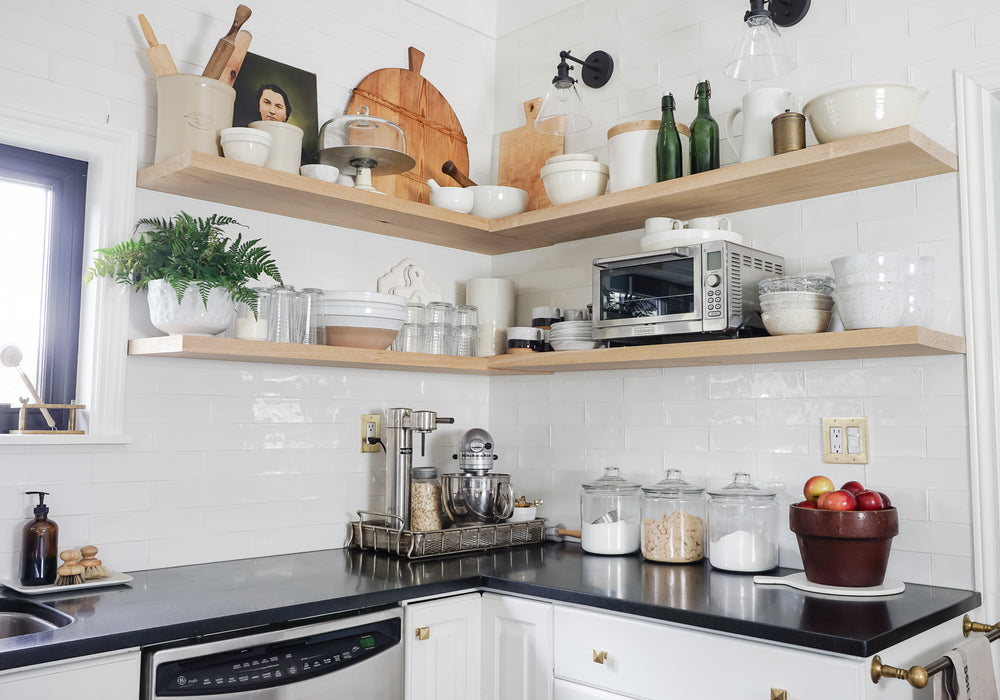
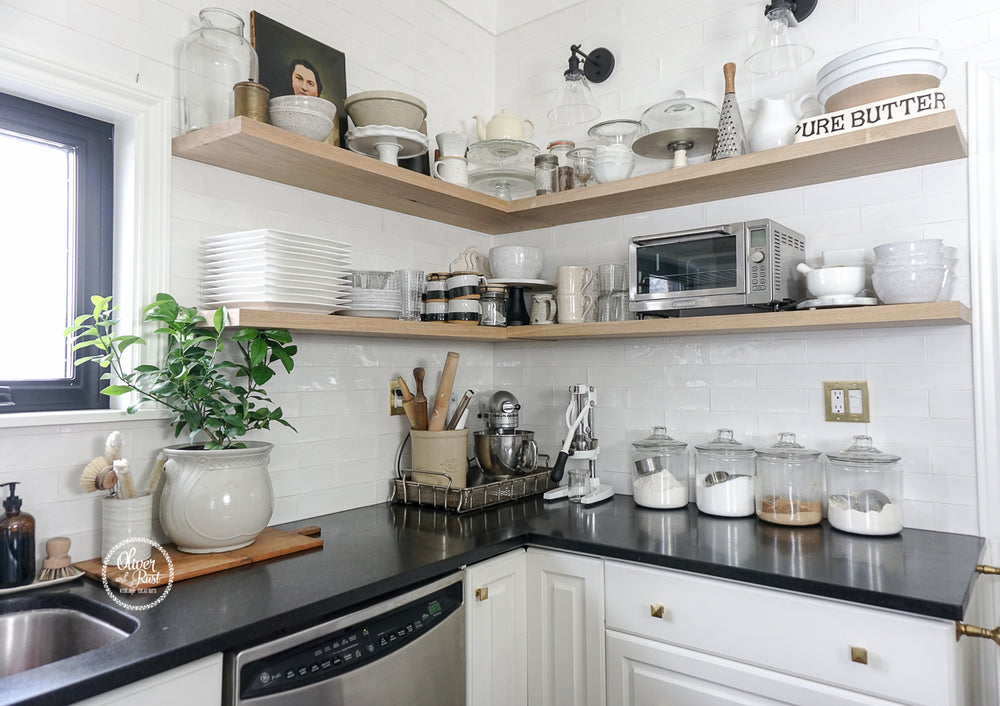
I wanted open shelving just for ease of access and less wasted space in the backs and corners.


This was our kitchen 2 years ago. It was the only photo recent I could find that showed the whole thing and the cupboards on the wall. It also showed the island set up we had been using for quite some time before replacing with the full worktable.

This stainless table was not technically an island but a work table from Ikea. It comes with a butcher block type bamboo top that we used for awhile until I had the marble fabricated. The wood top that comes with this wasn't super smooth butcher quality [as it isn't really intended for that] so kind of a pain for real meal prep but the island itself rocks. Soft close drawers and big open shelves for all of my bowls, cutting boards etc.
My wonderful husband came up with a solid plan for our floating shelves. I researched buying them premade.
Um no. Too expensive for the runs we needed.
The suggestions out there for the ledges and other methods work great if you weren't also expecting these shelves to practically hold an elephant.
I am expecting them to almost hold an elephant.
He used a hole saw to cut out the plaster [this part of our home is 75-80 so it's plaster] right to the stud and attached a 1/2" pipe flange directly to the stud. We had to make sure the boards we chose would have enough room to allow a 1/2" pipe to be run into it.
Why not use brackets? Sure that would have been easy but I really was going for the clean look and why do things the easy way right?

The shelves are white oak no special finishes just plain white oak.
Sconces above the shelf are from Amazon. The glass shades allow the light to pass through and light up the room.

The tile is a 3x12 white tile that has a natural wave to it. I wanted the classic subway tile look but with a more organic [for lack of a better word] feel. The wave gives it that old timey look.
For locals, it was purchased at Star Tile right in Fonthill down from the store.

After he attached the pipe flange to the stud, he cut out rounds of drywall allowing only the hole for the pipe to show through and then our amazing tiler could go right over top.
You can see the holes above where the tiler left the holes for the pipes.

The chandelier is from Crate and Barrel. I did not get it from there as I scored it off Kijiji in one of my cruises however it was only a year old and they do still offer it in store.

Clean countertops are always the goal but in a small space there is only so much that can be put away.
Essentials that are used daily like coffee maker, spoons, and food processor are out and on the counter and everything else including our microwave is stored in the cupboards. The microwave rarely gets used but we do still use it occasionally so it found a home inside a cupboard and has worked out great.

Probably one of my favourite appliances. Although non-powered so does that make it an appliance?
My industrial juicer.
I use it non-stop for lemons, limes [we eat a lot of mexican] and oranges. Therefore that baby gets pride of place right on the counter.


The toaster ended up on one of the shelves right over a plug. We plug it in when we want to use it and the plug just tucks up beside it when not in use. We originally intended to drill a hole in the shelf and leave it plugged in but are finding this is working perfectly so less holes. I think one of the biggest parts of any reno but specifically the big ones like kitchens and bathrooms, you really need to figure out how the rooms function FOR YOU.
Case in point open shelves are not for everyone.
In our kitchen we actually gained space by doing this and because of our intense love of food and cooking all the pieces get used regularly so dusting is also not an issue.

The shelves are loaded to the hilt with everything we use on the regular. Our daily mugs, plates, bowls, grains and the like. The shelves look styled in the sense that everything looks pretty to me visually but items have been put on the shelves in the importance of their access.

The hardware was changed out [from Rejuvenation] to tie in the chandelier. I scored them on sale and love the warm tone they add.


Well thanks for sharing in my little kitchen walk through.
We are in love with the space and even though there is still the accidental "where did I put?" while cleaning up we couldn't be happier with how it came out.
Good things come to those who wait. Isn't that how the saying goes?
Have a great day everyone,