My story is the same as many. We bought bicast leather chairs in our original move in to our home because the price of genuine leather club chairs was astronomical (which I have since learned Kijiji can fix quite nicely). Not 1 of those nice salemen have cats obviously. Did you know bicast leather is like catnip? I have since talked to many people that have had the same issues. Needless to say the front arms of our chairs look like string spaghetti within 2 months of their arrival. They sat like this for awhile, as it was ridiculous to think we had to get 2 new chairs right away but alas, to slipcover?
We hunted down a bunch of different slipcover options and they all came back around the same price mark. 500.00 plus fabric per chair. YIKES! The seats were attached to our chair (we cut them out in this project) so, that put them in the custom category.
My mom has had a sofa slipcovered, we have a few pieces of Ikea slipcover furniture and I found a handy DIY e-book online.
Here we go again: "We can make that right?"
I headed out to get my fabric, we lined up the sewing machines and away we went
The 2 club chairs took 6 yards of fabric approx. at about 100.00 (already a savings of 900.00)
This is a sort-of tutorial as we really just kind of wung-it with our previous slipcover experience.
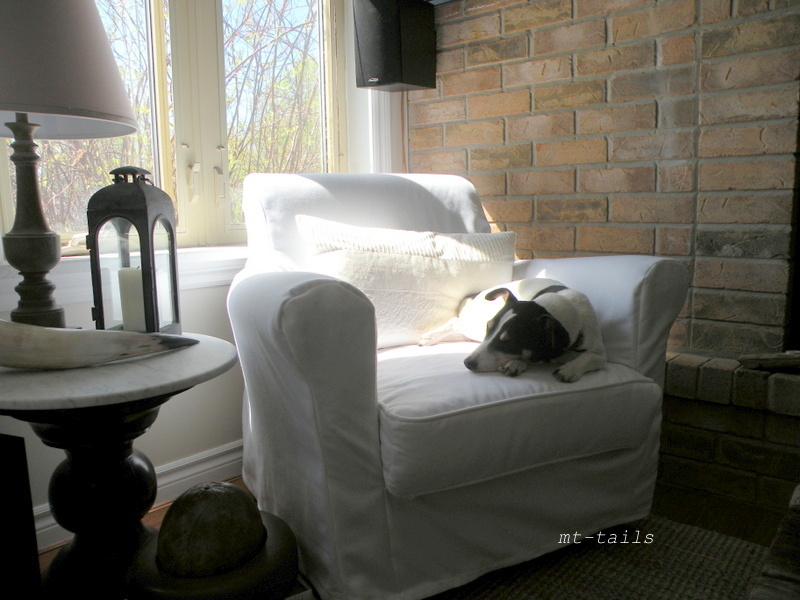
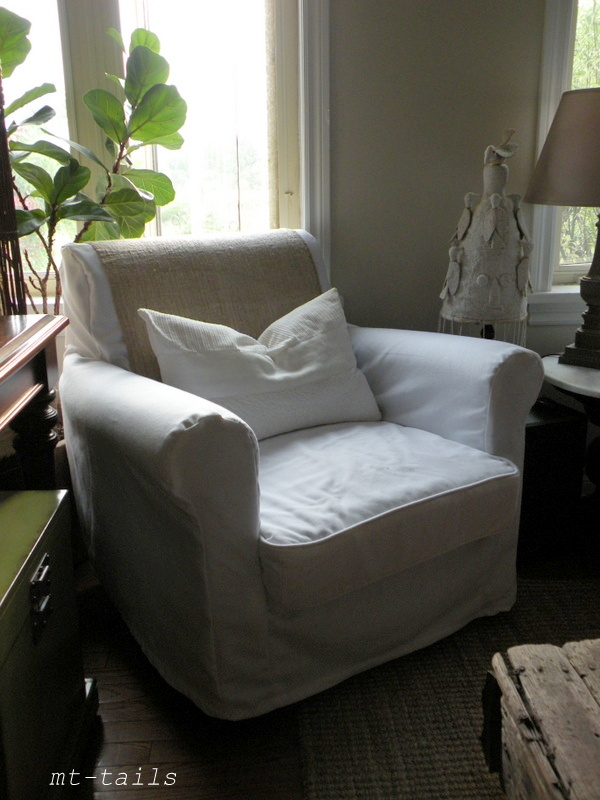
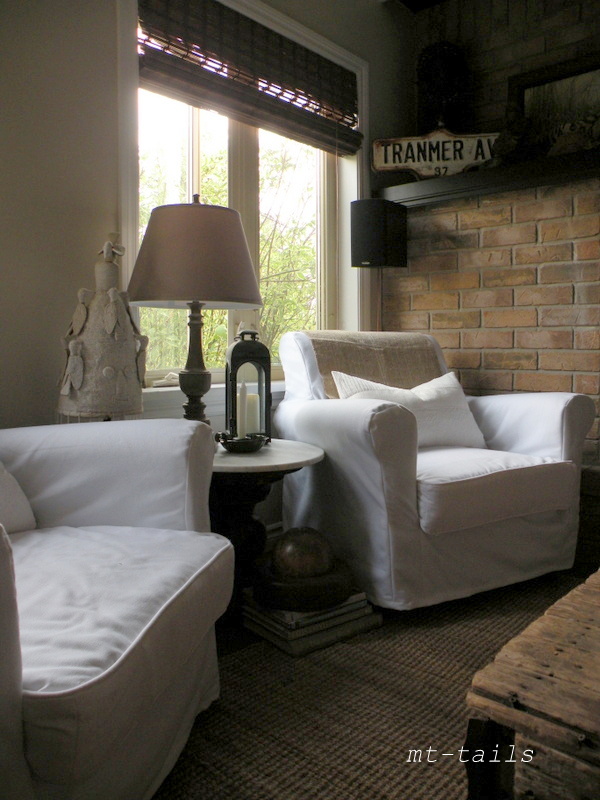
First: the finished product and exhibiting the main reason for slipcovers. WASHABLE! but so cute too!
The semi-tutorial:
Check out this e-book at Pink and Polka Dot
I am just going to show the add-on tutorial bits for a bit more custom look of a club chair rather than sofa. We started the same way as the book with the back of the chair, attached the seat and then worked on arm caps:
Biggest pieces of pre-advice:
-get a helper that knows how to sew. this could be a 1 person job but boy does it take longer without the spare set of hands
-try to work in a large space with a big table. we used a spare bed sheet on our table, so the loose threads and pins don't automatically end up on the ground
- check and double check the right side of your fabric between EVERY step especially if you are making white slipcovers
-try the slipcover on the right side out after every step to make sure you are getting your fit, it is hard to go back 3 steps later
-don't touch the pins after you iron the hem, trust me.

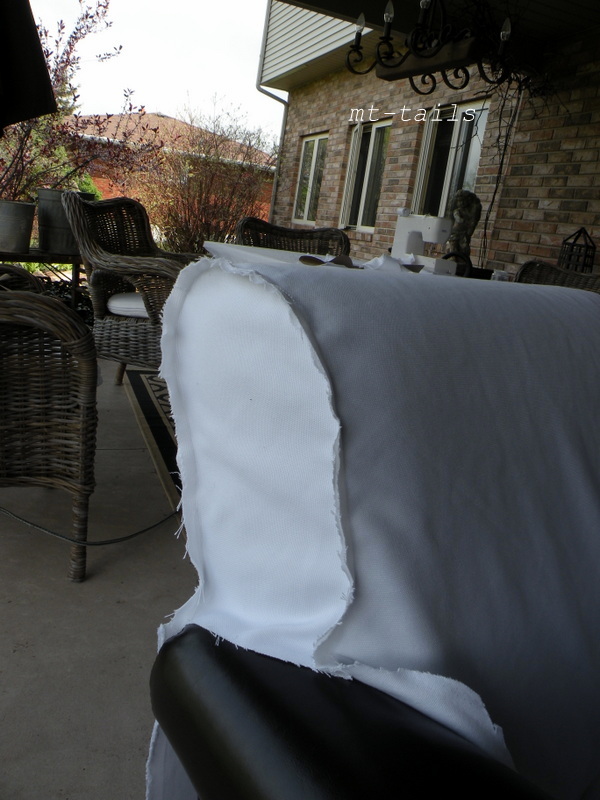
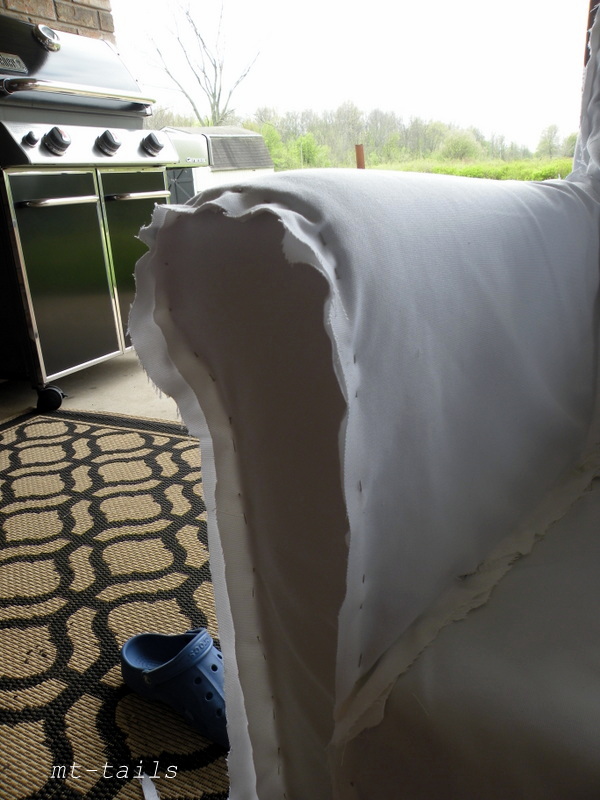
make a tracing on cardboard or paper of your arms and arm back. make sure to leave enough for a hem on the front arms. pin the fabric together and sew. this just gives your piece a more custom look than bunched together.
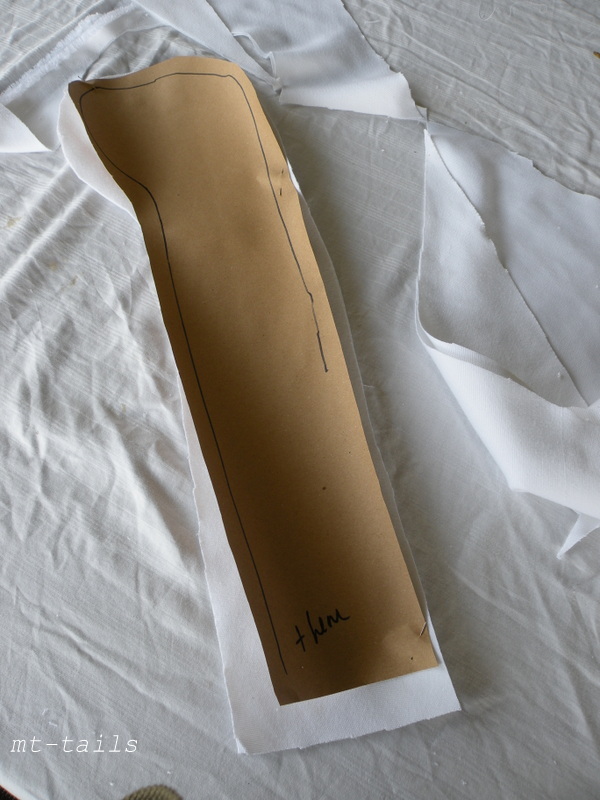
when making the arms, tuck in at the corners as this extra fabric will help it fit.
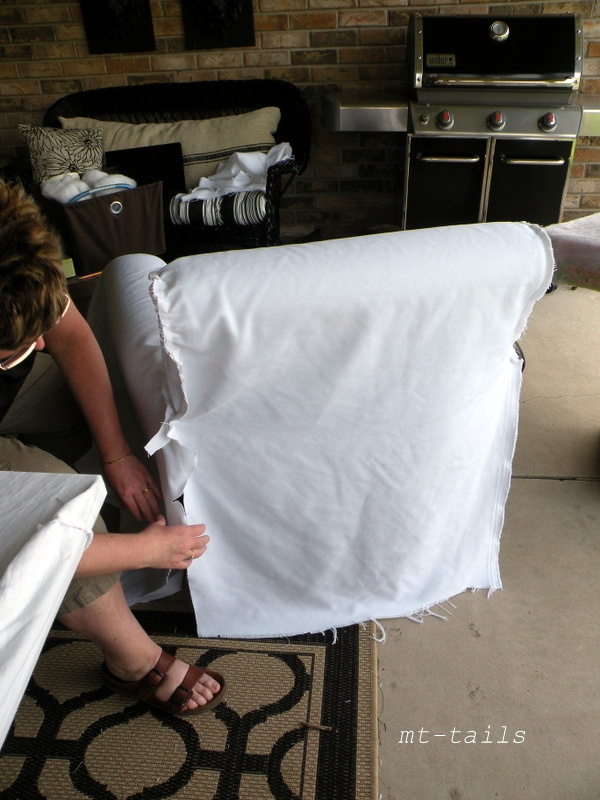
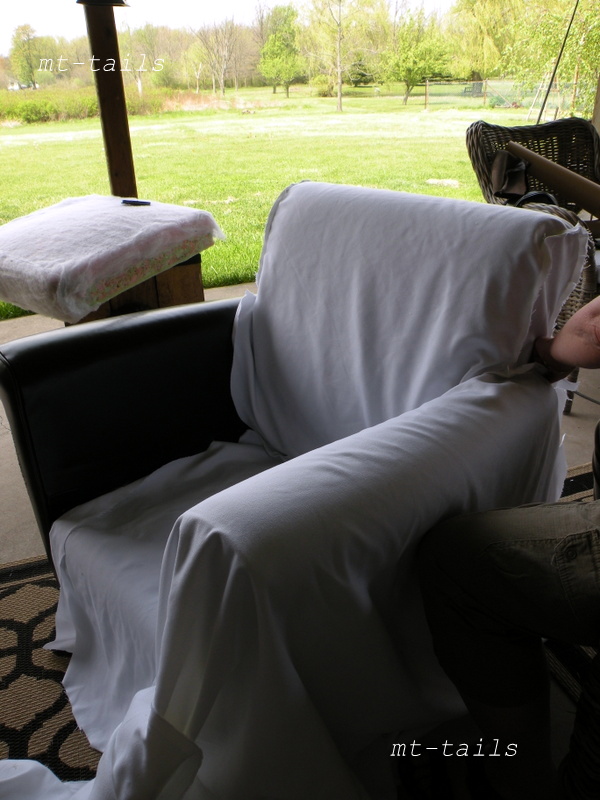
my supermom pinning the back to the arms. remember you are still leaving a hem allowance all the way around, don't tighten to much.
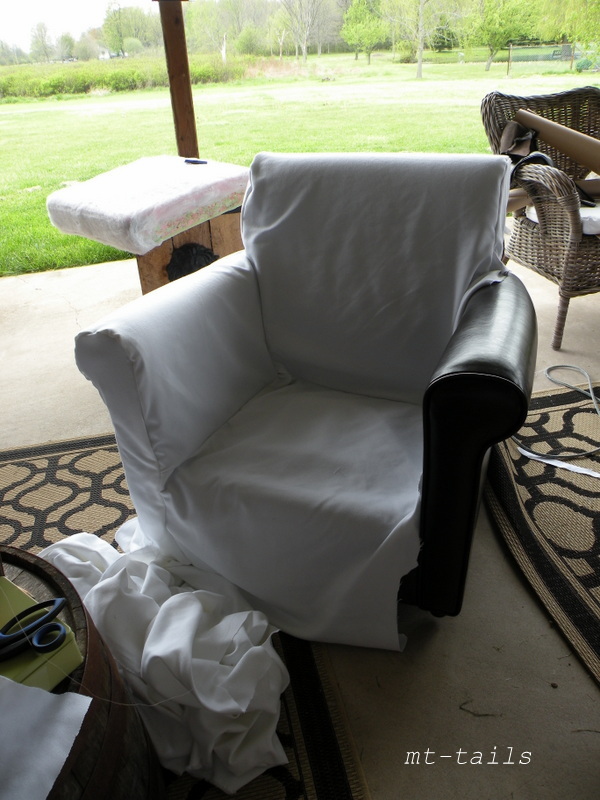
trying on after each addition
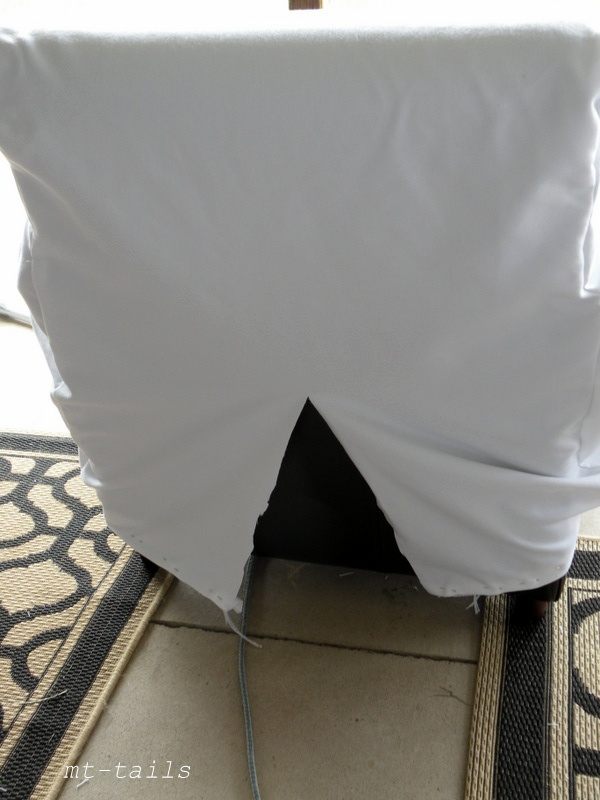
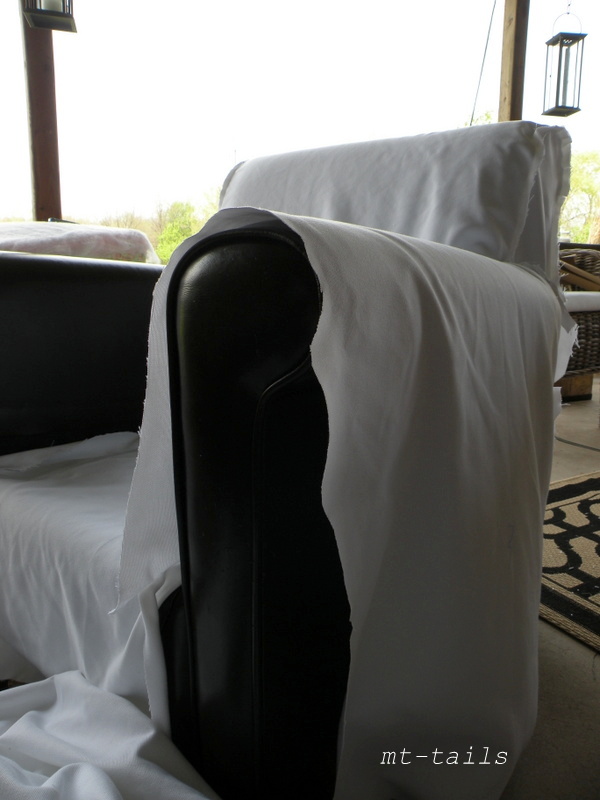
in order for your custom slipcover to fit properly it needs a little wiggle room, especially when you have rolled arms and back. the backs of my chairs are not visible so we cut and sewed a notch to make removal easier. you could always add a zipper or velcro.
I am not showing the seat creation as we chose to add piping to the seat for more structure. This was my first tour into piping and I might have had a slight case of trucker mouth and thought better not to document that. The instructions for seat slipcovers are readily available and are explained well in the e-book. Piping can also be made by your local upholsterer to save time and profanity.
The finished product views:
I would definitely attempt this again, maybe with the painters cloths you see so much. Once you get the rhythm of how it comes together, it is quite simple.
I don't proclaim to be an expert and I had lots of help but if you have any questions, I can try to answer them as best as possible.
Thanks for checking out my semi-tutorial
Have a great day
Meg
Entering..... (also check out her giveaway)